Support > Getting Started > Understanding CANDDi Contacts
Understanding CANDDi Contacts
As CANDDi gets to work, you’ll need to know the best way to utilise the information at your fingertips. Check out our tips for understanding CANDDi contact information below.
First things first, let’s have a little tour of the contact view:
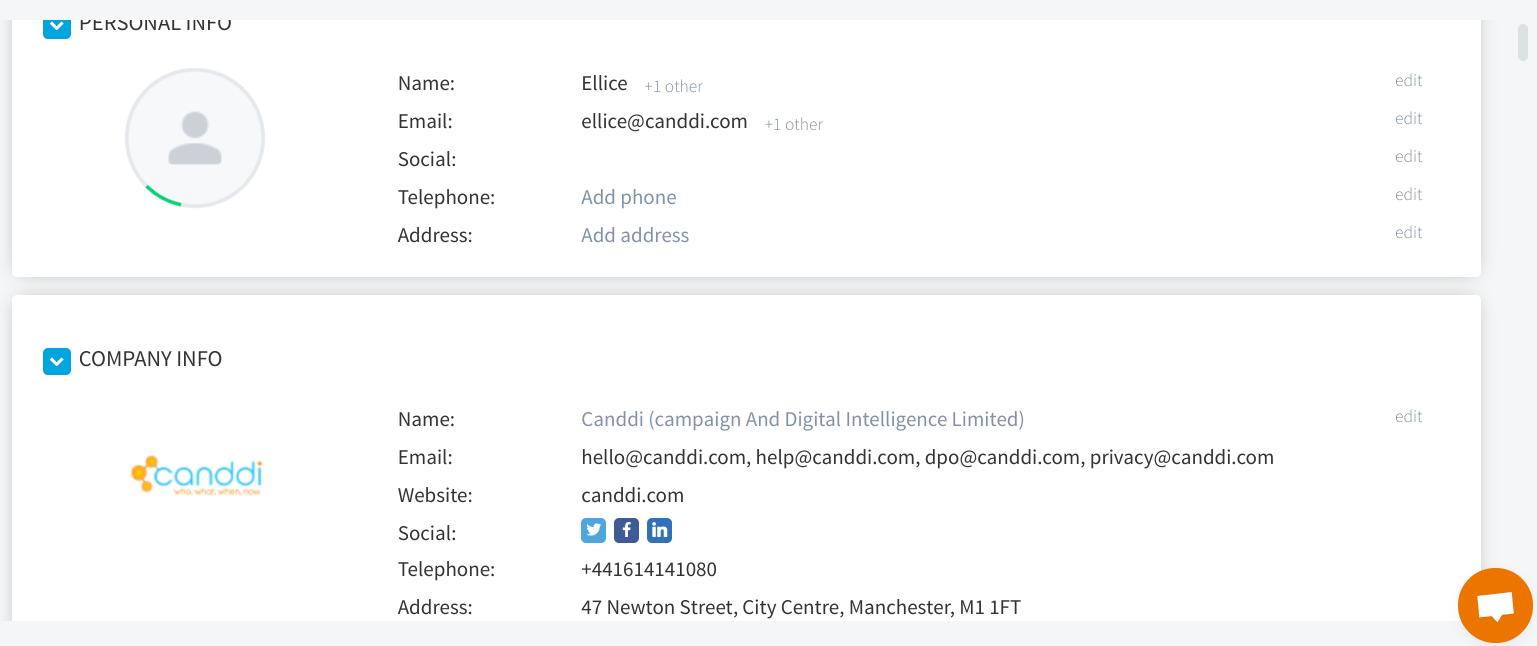
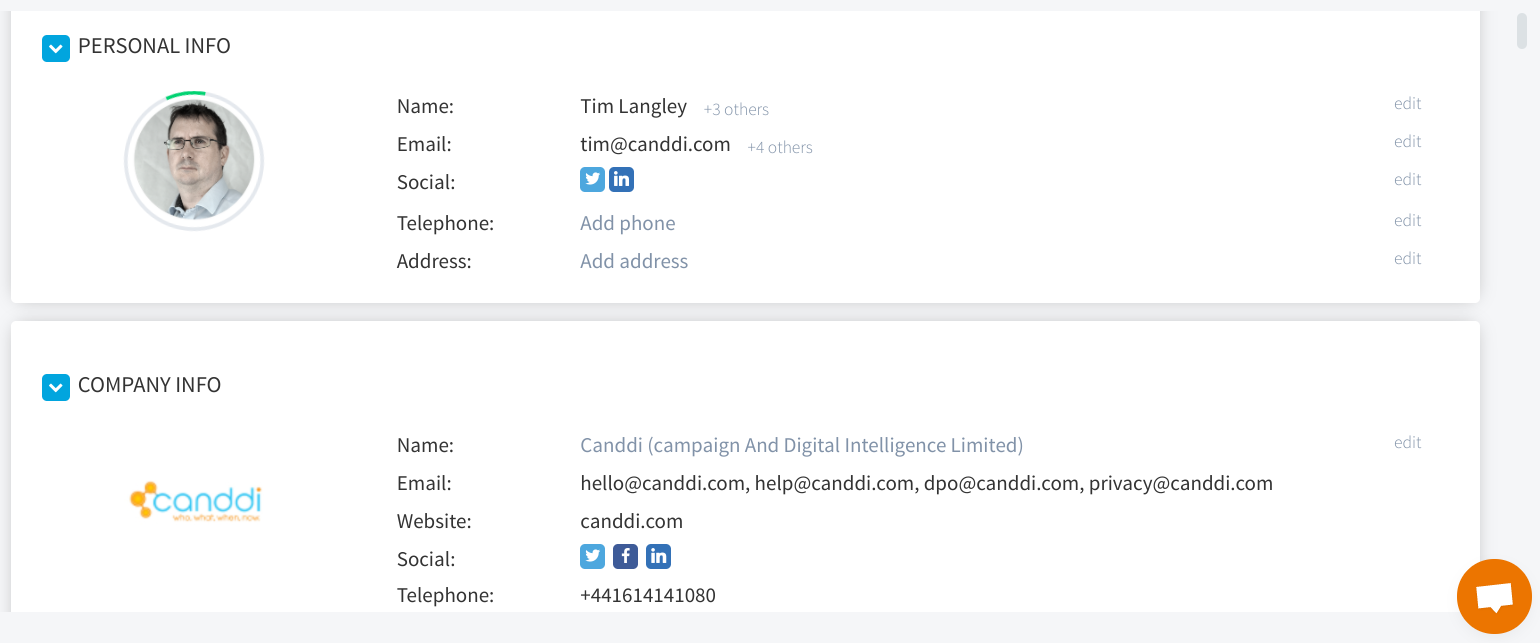
- Personal information - here you will find individual names and contact details
- Company information - firmographic data about the individuals place of work
- Contact tags - labels e.g. ‘Exclude’, ‘Converted’, or ‘Engaged’ - which can be applied to a visitor for more effective sorting.
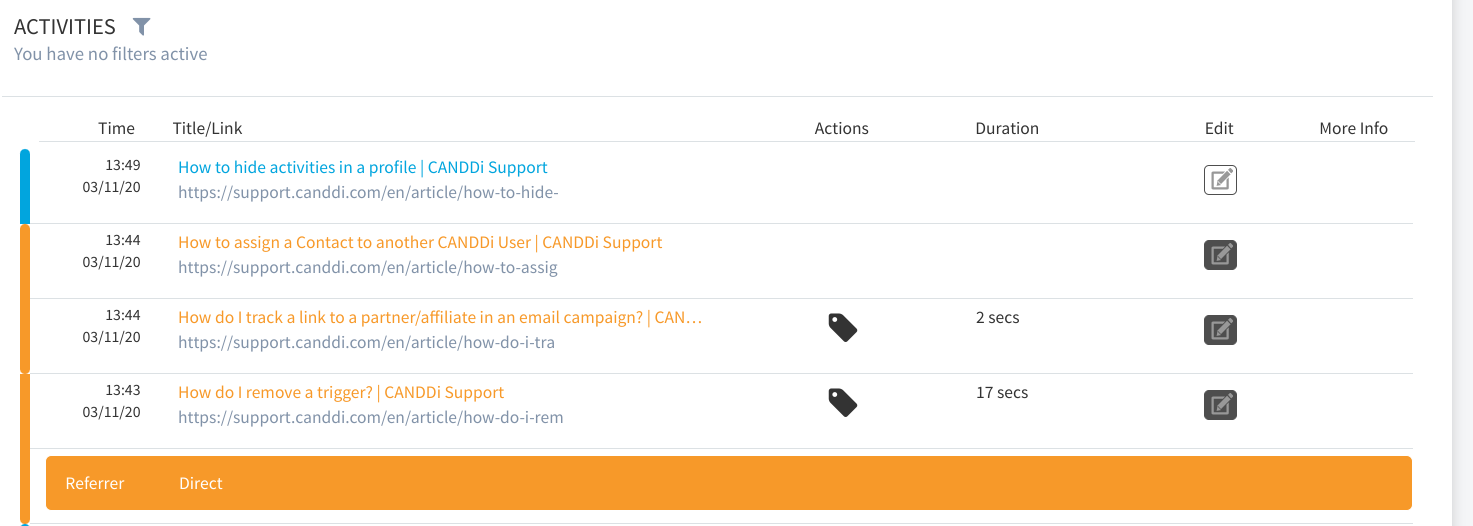
- Activities - details about what you’re website visitors have been upto including what pages they’ve looked at, how long they’ve spent browsing, any details they’ve left behind and how they landed online in the first place.
- IP address - info on the IP address visitors have been browsing on
- Location - this is not always the location of the person; sometimes it’s the location of the server.
- Comments - details about what edits have been made to the contact.
- Capture - if your visitors have filled in the CANDDi Capture on your website, you can view their answer here.
How to add/ alter contact information
When you log into your CANDDi dashboard, all your website visitors contact information will be available to view. If you want to add or change any details about your contacts, simply click on their contact profile and you’ll see an ‘edit’ button after each field of information.
Adding tags to contacts
If you want certain contacts to appear in certain streams, e.g. you don’t want to see people from ABC Limited, or you want to see which contacts have had a look at your blog page, you can do this by adding tags to their contact profile.
Once you’ve clicked on a profile, scroll down to the ‘contact tags’ section. Here you can see all the tags that have been added automatically, and any others you want to tag.
To add another tag, you’ll notice a search bar named ‘add tags’ - in here, start typing for the tag you want to add. If you want to create your own tag, you can manually input it in the box. It can be anything you want, just remember to separate any two words with an underscore.

Assigning a contact to a CANDDi user
Assigning a Contact to another CANDDi User enables that user to get automatically notified when this Contact returns or performs interesting activity on your site
First, click on the profile of the Contact you wish to Assign, and then on the ‘assign’ button towards the top left. This will open a pop-up that will prompt you to add a CANDDi user. You can also select ‘Assign to me’ if you wish to assign the contact to yourself.
The Contact will be assigned to the appropriate User. The User will receive an email notification that this Contact has been assigned to them and the Contact will appear in the assigned stream for this user.
How to hide activities in a contact profile
If you would like to hide an activity in a profile, click on the contact profile you want to edit and scroll down to the activity section. When you see the activity you want to hide, click on the pencil icon to the right of the activity.
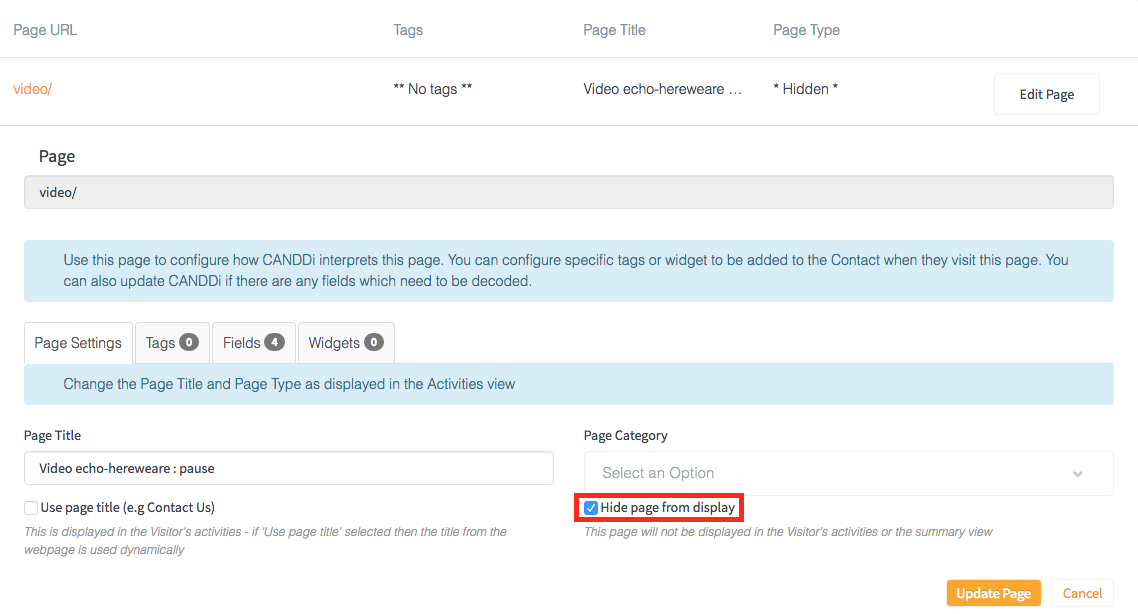
This will take you to the site tagging settings. CANDDi should have already opened the edit view of the page for you so scroll down to the page settings section and tick the ‘hide page from display’ box. Click ‘Update Page’ to save the changes.
Searching for contacts
In your CANDDi dashboard, you will see a search bar on the top right hand side.
Here you can do a real time search without having to create a new stream. Using the drop down list, you can search through our contacts by inputting email addresses, company names and IP addresses.
In order to search more than one item, separate them by commas.
Once you have clicked search, you should then see the relevant information being displayed.
Can I see which contacts have been assigned to certain users?
Yep you can! All you have to do is build a new stream.
Start by creating a new stream, and adding the tag ‘assigned to’ from the tag dropdown menu. You’ll then need to select ‘with a value of’ and then select a user from the final dropdown list.
Don’t forget to name your stream and save it! You can also share it with your fellow CANDDi users if you fancy.
If you need help understanding your CANDDi contacts, reach out to the team at help@canddi.com