Support > Getting Started > Auto-Tagging Explained...
Auto-Tagging Explained...
CANDDi provides a lot of information about website visitors.
So instead of spending loads of time digging for the most valuable visitors, Auto-tagging allows you to automatically apply labels to visitors for easier sorting!
How to create an auto-tag
One reason you may decide to set up an auto-tag is to automatically exclude visitors from a particular location.
So for this example, let’s look at how you would go about tagging visitors from France with an Exclude tag.
- In settings, click on Auto Tagging on the left hand side of the screen
- Click Create Auto Tag
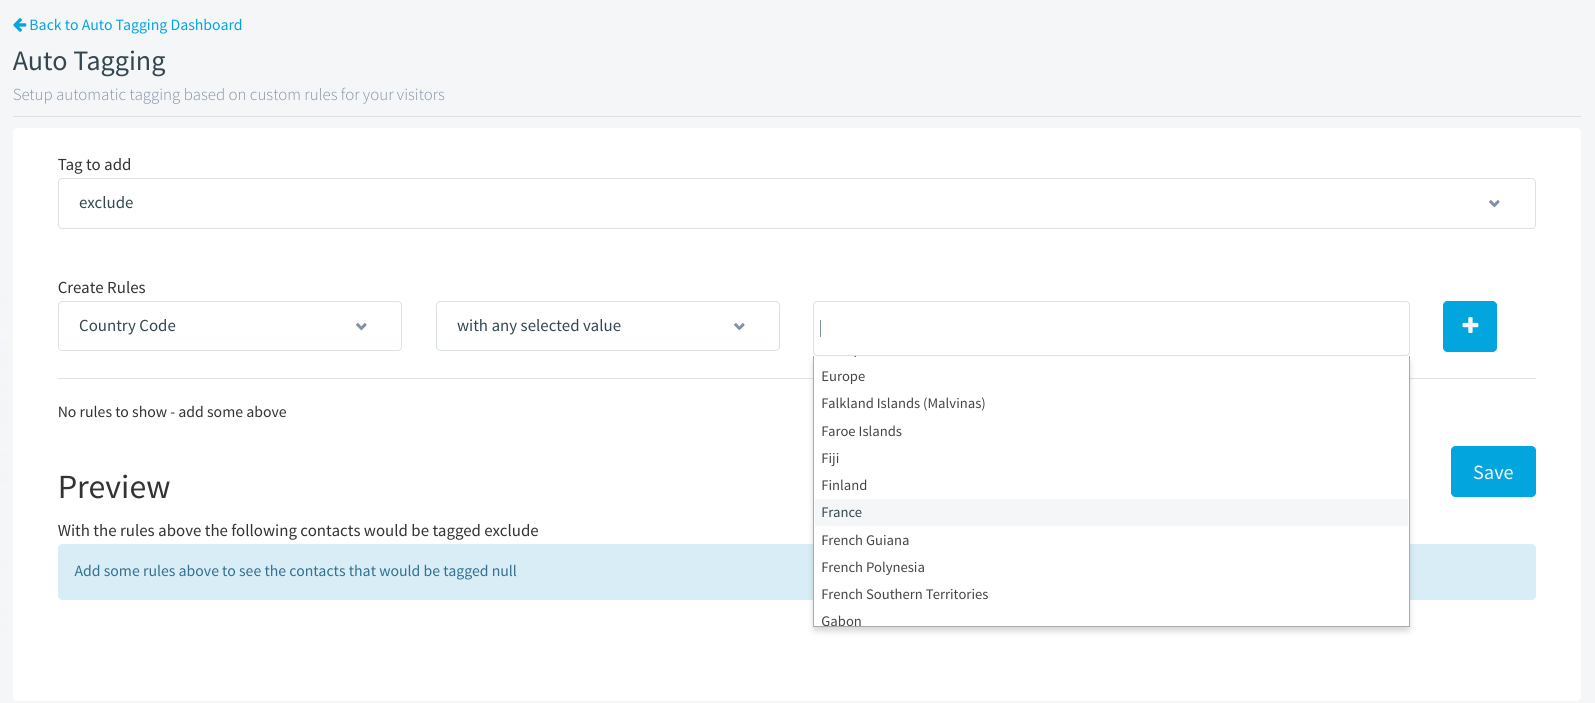
- Set the Tag to add to Exclude, since this is the tag we want to apply to visitors in this instance
- Since we’re applying this tag to a particular country, select Country Code as your rule parameter
- For the next box, select ‘with any selected value’, as we want to single out visitors who ARE from a particular country (in this instance, France)
- In the final box, select France on the country dropdown list
- Click Save
Voila! With this auto-tag rule in place, every user visiting from France will have their individual profile labeled with the Exclude tag. That means they won’t appear in any of your Streams (unless you specify otherwise in that Stream’s rules).
This is just one specific example of how auto-tagging can be used, but there are many other possibilities. Instead of an Exclude tag, for example, you may want to automatically apply an Engaged tag to any visitor who carries out specific activities on your site. This would allow you to quickly filter to your warmest prospects whenever you like!
So once you’ve figured out which kind of visitors you’d like to apply which kind of tags to, get in there and start adding rules! And if you need any help configuring auto-tag rules, don’t hesitate to get in touch with us and we’ll happily guide you through it.