Support > Getting Started > How to Manually Install Your CANDDi Tracking Code
How to Manually Install Your CANDDi Tracking Code
Depending on what kind of website you have, the CANDDi tracking code can be installed in a matter of seconds to begin tracking your website.
This guide concerns manually installing your CANDDi Tracking Code using Javascript, so keep in mind that if your website uses any of the following systems…
- Wordpress
- Google Tag Manager
- Squarespace
- Instapage
- Weebly
- Tumblr
- Pagewiz
- Jimdo
- Volusion
- Blogger
- BigCommerce
- 1&1
- Wix
…Then it’s much easier to get CANDDi tracking your website by clicking your system above and following through to its respective guide.
Now, if instead you’d like to install your CANDDi Tracking Code manually, continue reading this guide!
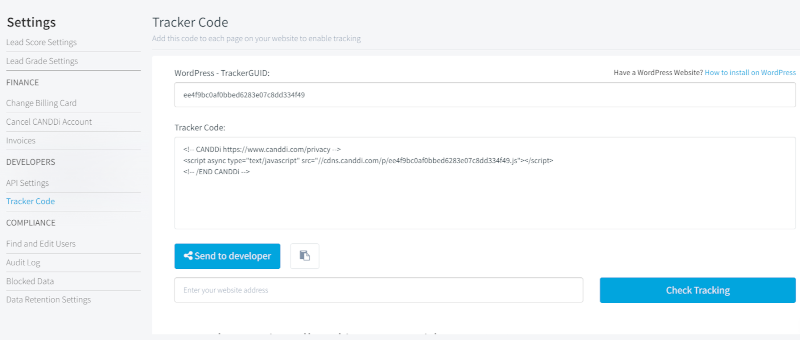
The CANDDi Tracking Code refers to the six lines of javascript code which need to be inserted into every page of your website. CANDDi uses this to record the data from each visit.
- Copy your CANDDi tracking code.
- Paste the code onto each page of your website. We recommend putting this into the footer of each page (immediately before the closing </body> tag)
After pasting the tracking code into the footer of every page, you should check everything is tracking correctly by following the following steps:
- Head back to your CANDDi Dashboard.
- Navigate to the ‘Settings’ tab.
- Scroll down to the ‘Developers’ section and click on ‘Tracker Code’.
- Enter the URLs of some pages of your site to see if it’s tracking correctly.
And that’s it, you’re all set!
If you have any problems with installing your CANDDi tracking code, please contact our customer success team at help@canddi.com