The Tagging Dashboard

Tags are ways to label and prioritise certain visitors or pages on your website. You may want to Tag everyone who logs into your client portal as ‘Client’ for example, by adding a Tag to the login page - you can easily do this. Or you may want to see all visitors who look as a particular product page as ‘Hot Prospect’ so you can create a Stream for your salespeople.

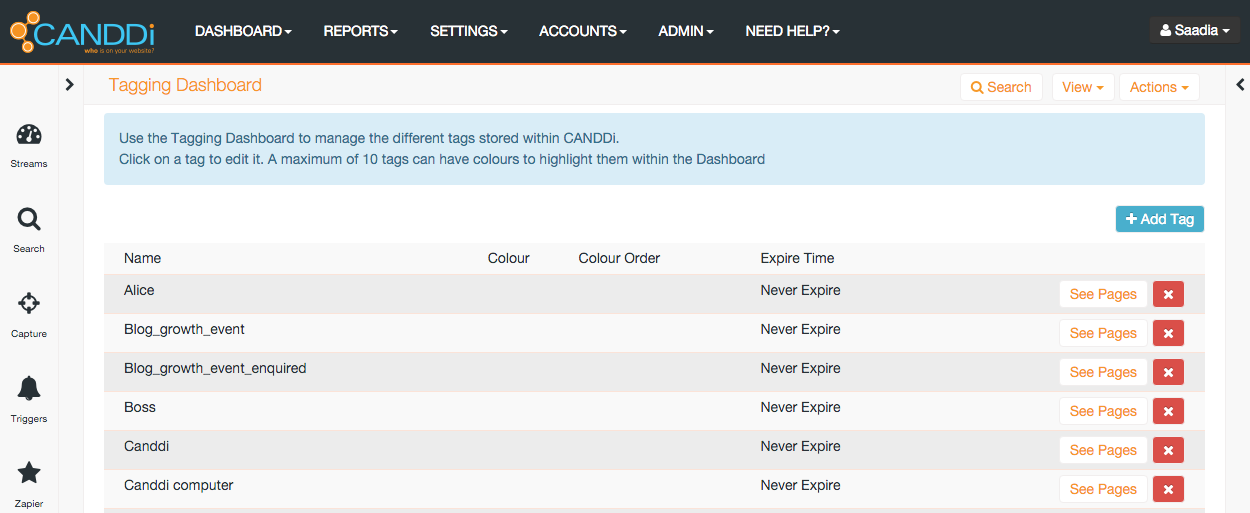
The Tagging Dashboard allows you to manage Tags within CANDDi...
What the Tag???? (sounded funnier in my head)

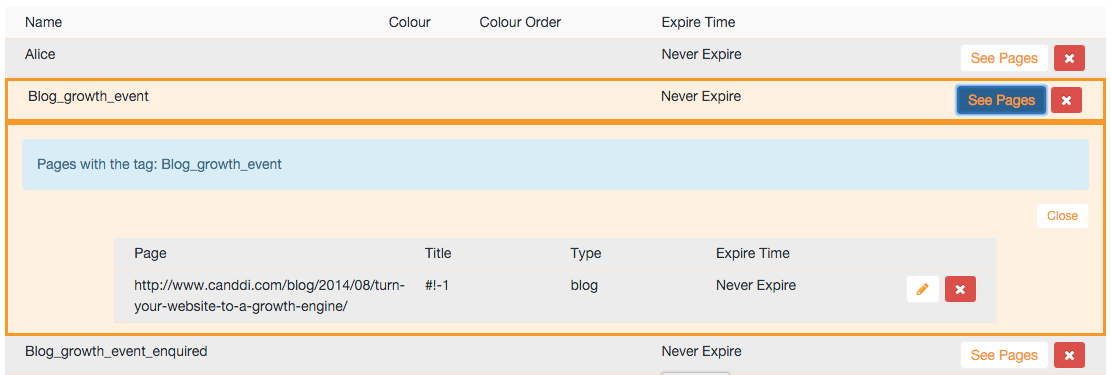
Using Tags is great, our clients love it for loads of different reasons, but when you get Tag-Happy - it’s useful to have reminder of which pages you added a particular Tag to. By clicking on ‘See Pages’ you’ll be able to see all the pages you added that Tag to!
Tag Colours
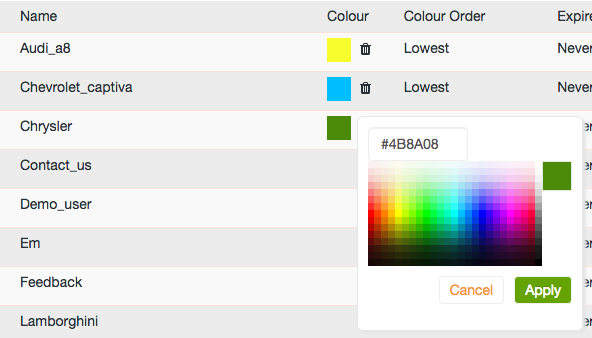
You can also now change the colours of both default, and new Tags too. So you can define a Tag for everyone who completes your CANDDi Capture and make it yellow, for example. You can also set the colour order, this defines how important that particular Tag is in relation to the all the other Tags.


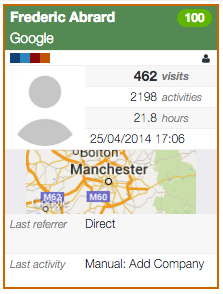
The colour of the Tag you class as MOST important is the colour displayed on the banner of the contact card. The top 5 most important Tag colours will be displayed underneath the banner as a quick reference for you.
Tag Expiry

This allows you to set a time frame the Tag is valid for...so you might Tag someone who has viewed Product X as ‘Viewed Product X’ but only be interested for a week or two maximum (because they’re no longer as interesting a prospect for you). You can set an expiry for 7 or 14 days and the contact will only have the Tag for a limited period of time - the Tag will then disappear and the contact will drop out of any Streams associated with that specific Tag.
Obviously if they view Product X again, they will rejoin the Stream and you’ll get a new notification to let you know. This is great for streamlining your Tags and ensuring you don’t miss the hottest prospects.