Support > Settings > How to Use Time-Expiring Tags For Up-To-Date Streams
How to Use Time-Expiring Tags For Up-To-Date Streams
What is a time-expiring tag?
A time-expiring tag is simply a tag which will be removed from a contact in CANDDi after a set period of time.
This is useful if you’d only like a visitor to carry a tag for a certain period of time beyond the action which applies the tag.
For example, let’s say I have a tag called Visited_Pricing which gets applied to contacts in CANDDi when they visit my pricing page. This is useful as it allows me to create a Stream to see all of my visitors who have looked at pricing.
But here’s the thing - do I really want to see every visitor who has ever visited my pricing page since the beginning of time? If I’m a salesperson, I’m probably only interested in those who have visited it in the past week.
To achieve this, I can put a time expiration of 7 days on my Visited_Pricing tag. This way, only visitors who looked at my pricing page in the past week will show up in my Stream.
How do I create a time-expiring tag?
Creating a time-expiring tag is super simple!
- In your CANDDi Dashboard, head to the Settings tab
Click on Tags Management

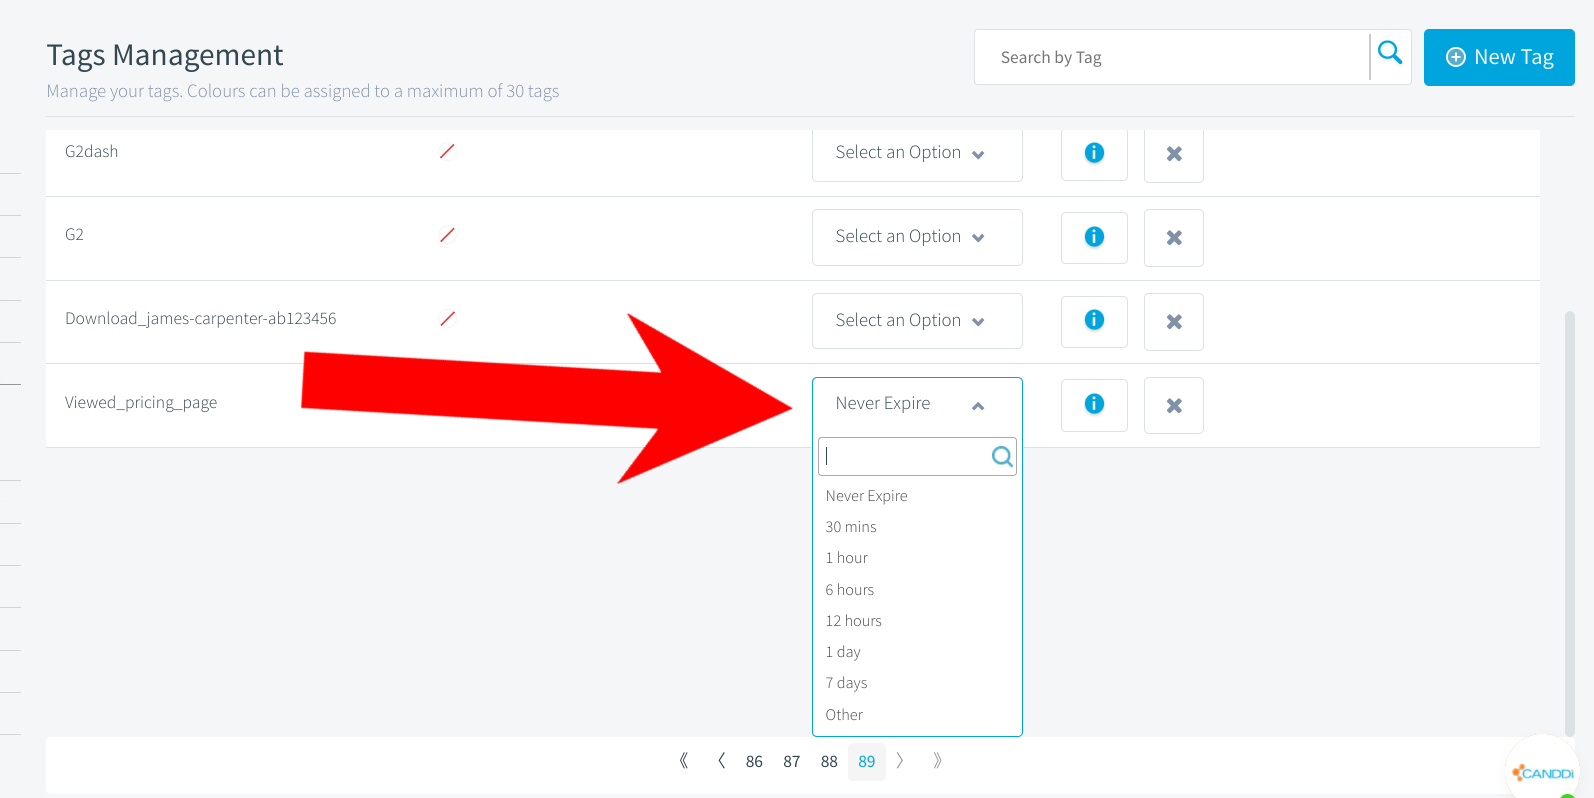
- Either find the tag you’d like to add a time expiry to, or simply create a new one by clicking ‘New Tag’
Click the dropdown next to your tag, and select an expiry time period
And you’re done! From now on, your tag will be removed from a contact when the selected time period elapses.
If you have any questions about time-expiring tags, please get in touch at help@canddi.com!