Support > Identify > Integrating CANDDi With Your Website Forms
Integrating CANDDi With Your Website Forms
Why integrate CANDDi with my website forms?
When integrated, CANDDi will identify anyone who fills in a form on your website. Of course, you will already have this information, but CANDDi does this because:
- You can now see every action they took on your site prior to filling in the form
- As with all identified visitors, you’ll now know about every time they return to your site in the future
The best part is, CANDDi’s integration with the forms on your website is automatic in most cases, requiring no work on your part! Read on to find out more…
How to get started
In the vast majority of cases, CANDDi will automatically track your website forms from the moment our tracking code goes live on your website.
However, if you use any of the following services for your forms:
- Hubspot Forms
- Marketo Forms
- NinjaForms
You will simply need to flick a switch in your CANDDi settings. To do this, follow these steps:
- In your CANDDi Dashboard, navigate to ‘Settings’
Under ‘Site Management’, click ‘Form and Video Tracking’
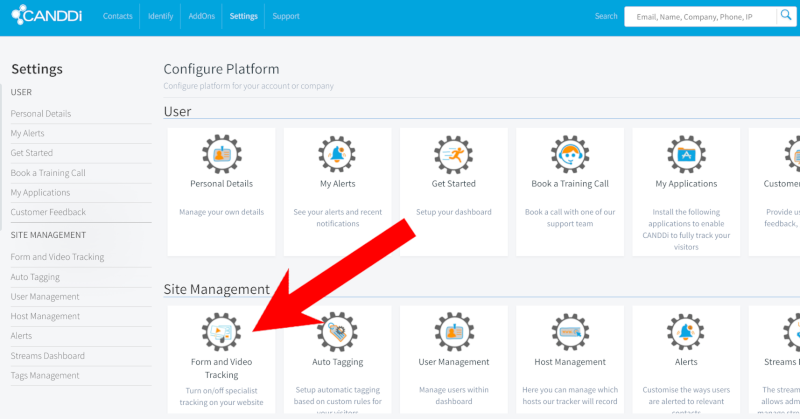
Toggle the switch to ‘enabled’ for the form tracking service you use
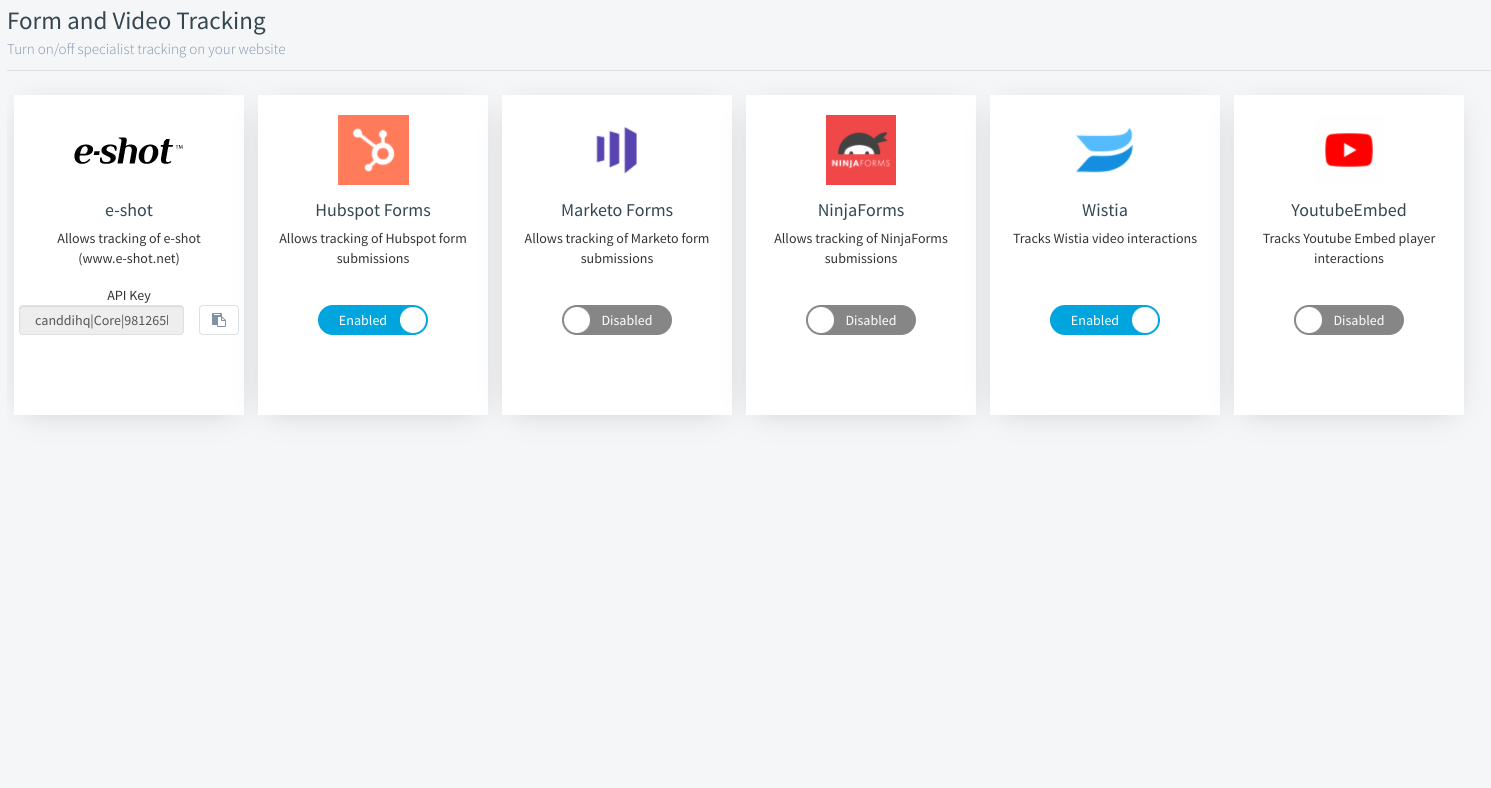
Other forms tracked by CANDDi
Wufoo
Wufoo is an online form builder which makes it very easy to design custom forms for your website. Unfortunately, Wufoo runs within an iFrame, which means that CANDDi does not track these forms out of the box.
This guide looks at how to configure Wufoo so that CANDDi can track the submitted form data. This only works for Wufoo paid users.
Set-up your Wufoo form as normal within their Interface. After configuring the form, click on ‘Form Settings’ and then ‘Confirmation Options’ and ‘Redirect to Website’.
If this isn’t set, then you need to add a ‘thank you’ page on your website where users will be redirected once they have successfully completed the form. Paste your URL in where it says ‘YOUR URL’. You then need to add some parameters and specifically you need to add the same parameters as CANDDi uses for email integration:
ce={entry:FIELD_NAME_FOR_EMAIL} cn={entry:FIELD_NAME_FOR_NAME}
The ‘api’ FIELD_NAME_xx must be precisely as displayed on the Wufoo field (capitalisation is important here). The field name can be found in the Template Tags section.
The fields table contains field title and API ID. The ‘api field name’ is ‘Field’+’API Id’. In the example below, First Name is Field1 and the data for the CANDDi querystring is: cfn={entry:Field1}
SharpSpring
If you have Sharpspring on your website, you’ll recognise that it integrates in a very similar way to CANDDi by installing a javascript snippet into the headers across the site.
Getting both CANDDi and Sharpspring to work simultaneously on your forms is possible, it just takes a little configuration at the back end.
Follow these steps to get them both working.
Edit your form script to include CANDDi’s tracking variables, so the forms can read CANDDi tracking, we can do this by editing the bottom line of the first script section only.
Adding what Sharpspring refers to as “hidden fields”, which are mainly used by third parties (such as CANDDi) to transfer more information with the form submissions.
The final step requires you to add CANDDi as a third party service within your Sharpspring Dashboard.
You will have to carry out these steps for each form across the site you want CANDDi to track.
If you’re using any other form types, just get in touch with the team and we’ll see what we can do for you! Email us at help@canddi.com